





OIDC
Contents
Where is this feature available?
Free / Open-source
Paid
Boost
Scale
Enterprise


OpenID Connect (OIDC) enables users to access multiple systems with a single set of credentials. This is helpful for growing organizations that require centralized user management in an Identity Provider (IdP).
Prerequisites
If you are using PostHog cloud, your organization must be subscribed to a platform package that offers OIDC. If you are self-hosting PostHog, your instance must have an enterprise license that supports OIDC.
You need to verify domains for any email address that you want to allow users to login with. For example, if you want to allow users with an
@example.comemail address to login, likejohn@example.com, you need to add and verifyexample.comas an authentication domain.If you are self-hosting PostHog, make sure you have properly set up your
SITE_URLenvironment variable configuration.If you are self-hosting PostHog, your PostHog instance must be accessible from the public internet over TLS.
Configuring OIDC
Navigate to your organization's authentication settings page in PostHog.
Scroll down to the OIDC section, and select Configure.
In your IdP, create a new OIDC app for PostHog.
a. Copy the "Redirect URL" displayed in PostHog into your OIDC app's configuration in your IdP.
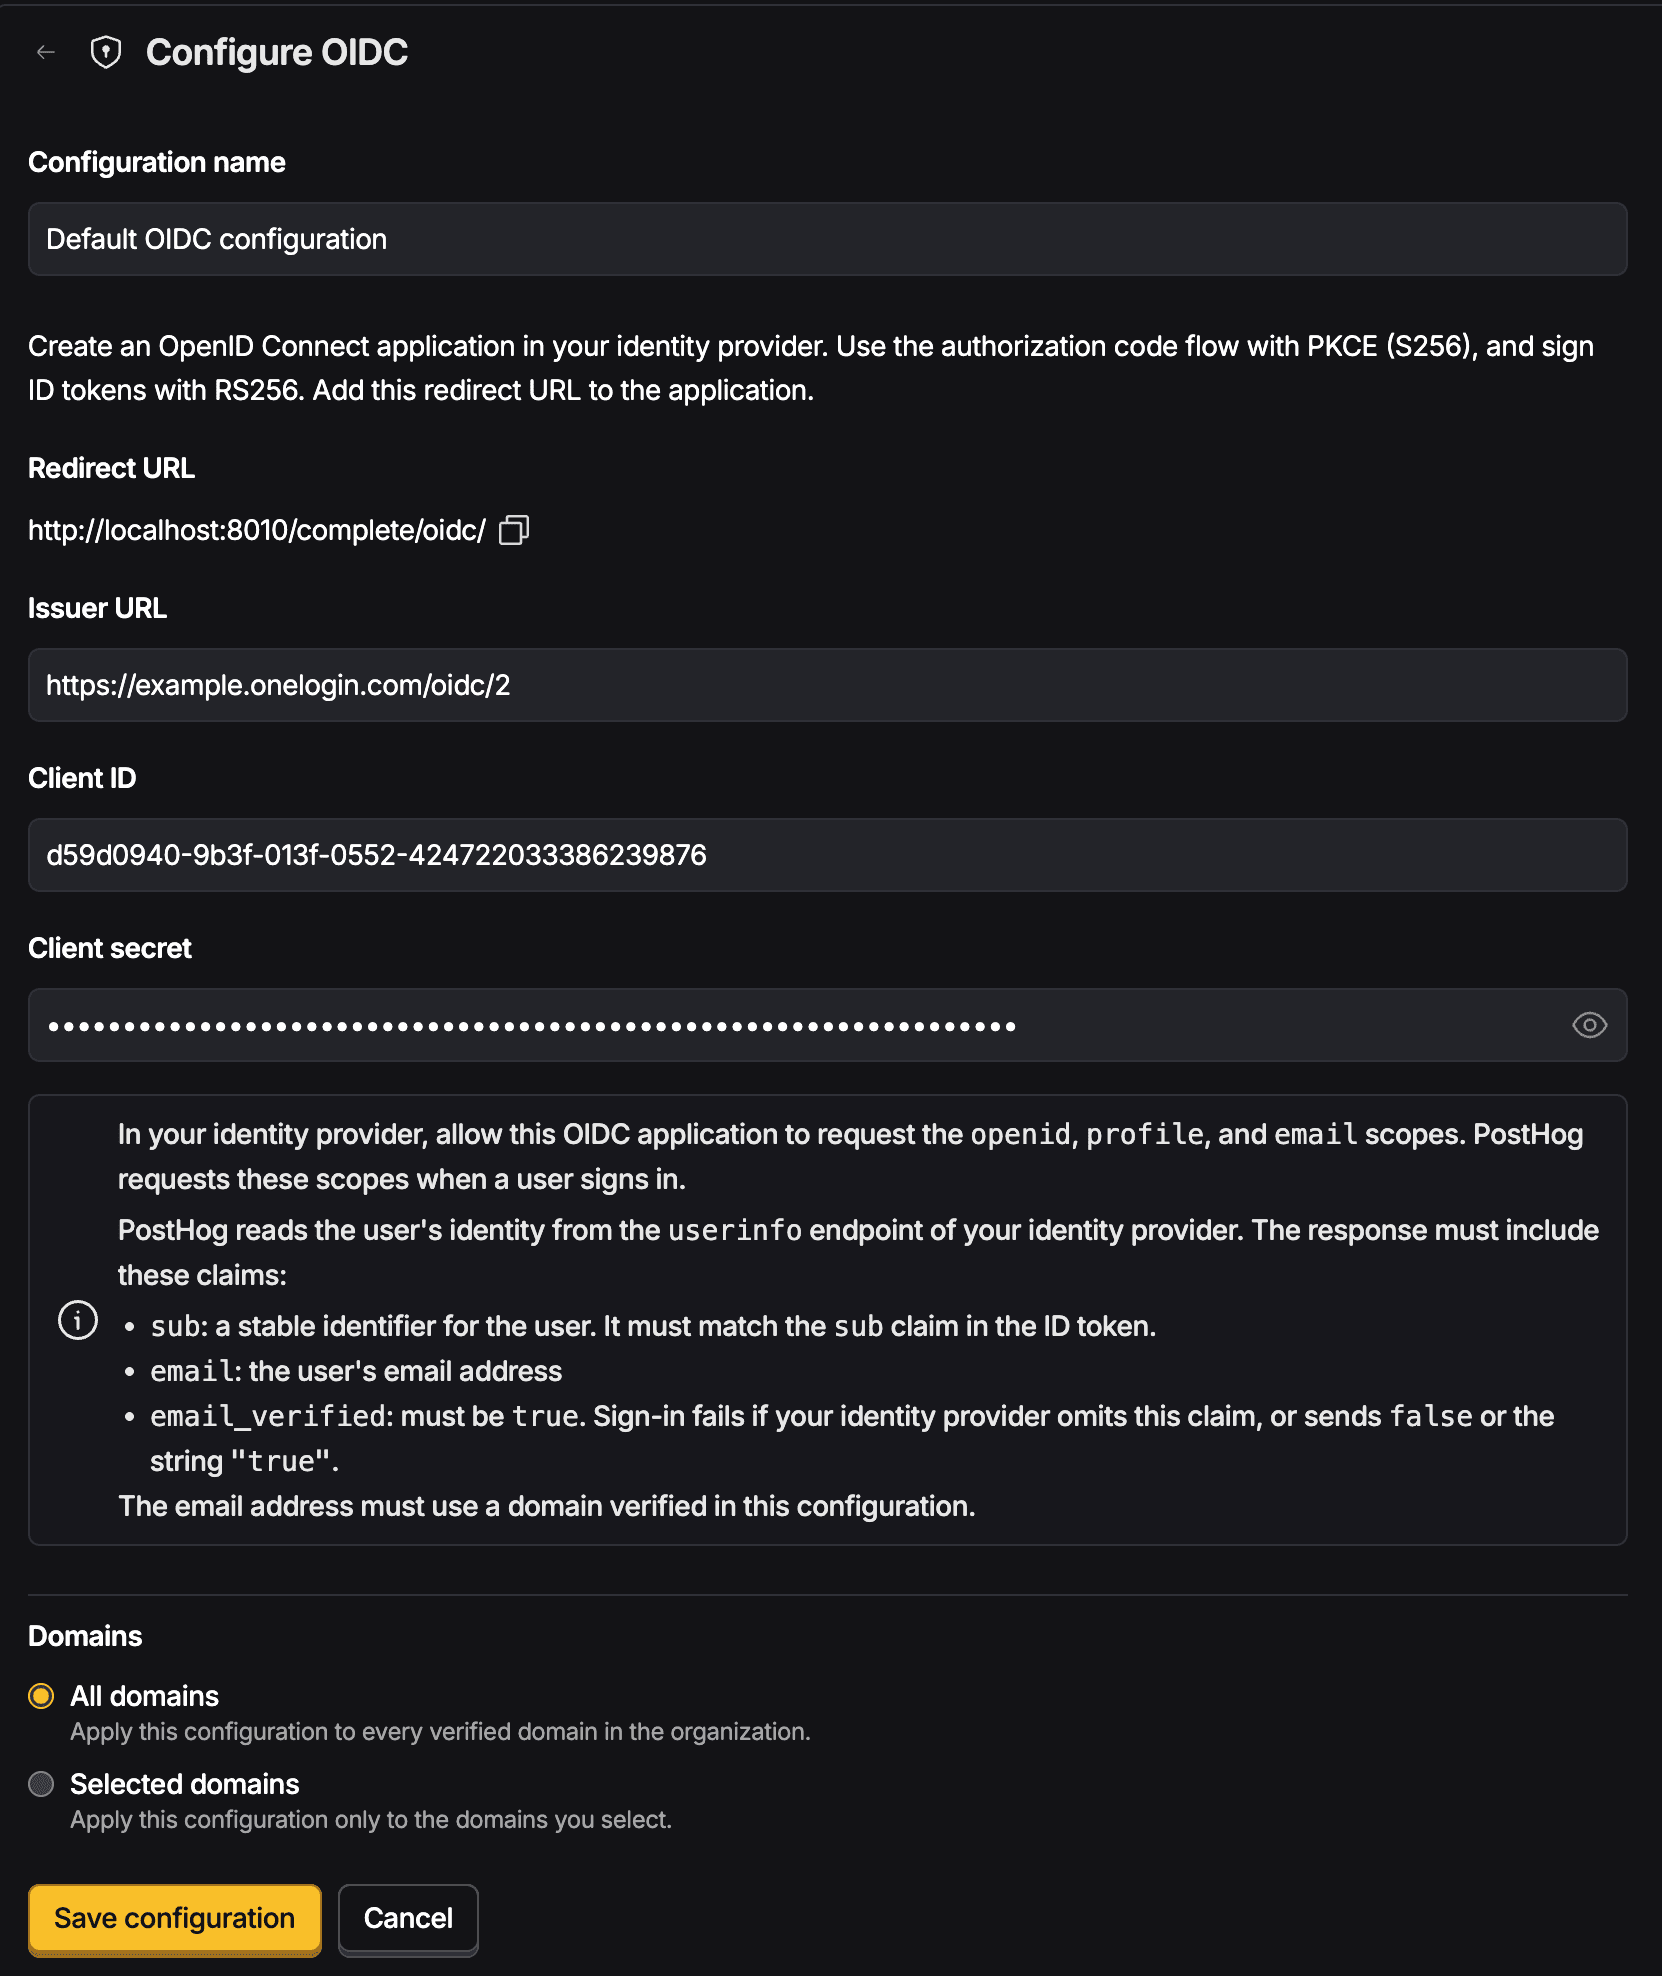
b. Copy the "Issuer URL", "Client ID", "Client Secret" fields from your OIDC app's configuration in your IdP into the configuration fields in PostHog. If you do not see "Issuer URL" in your IdP, it will be the domain you use to login to the IdP, prefixed by
https://.c. Verify that your IdP shares the
emailandemail_verifiedOpenID claims with PostHog. Without these claims, PostHog cannot associated your users with their email address.Select Save.
Example: Okta
In Okta admin, go to Applications and select Create App Integration.

Select the OIDC - OpenID Connect option for sign-in method. For application type, select Web Application.
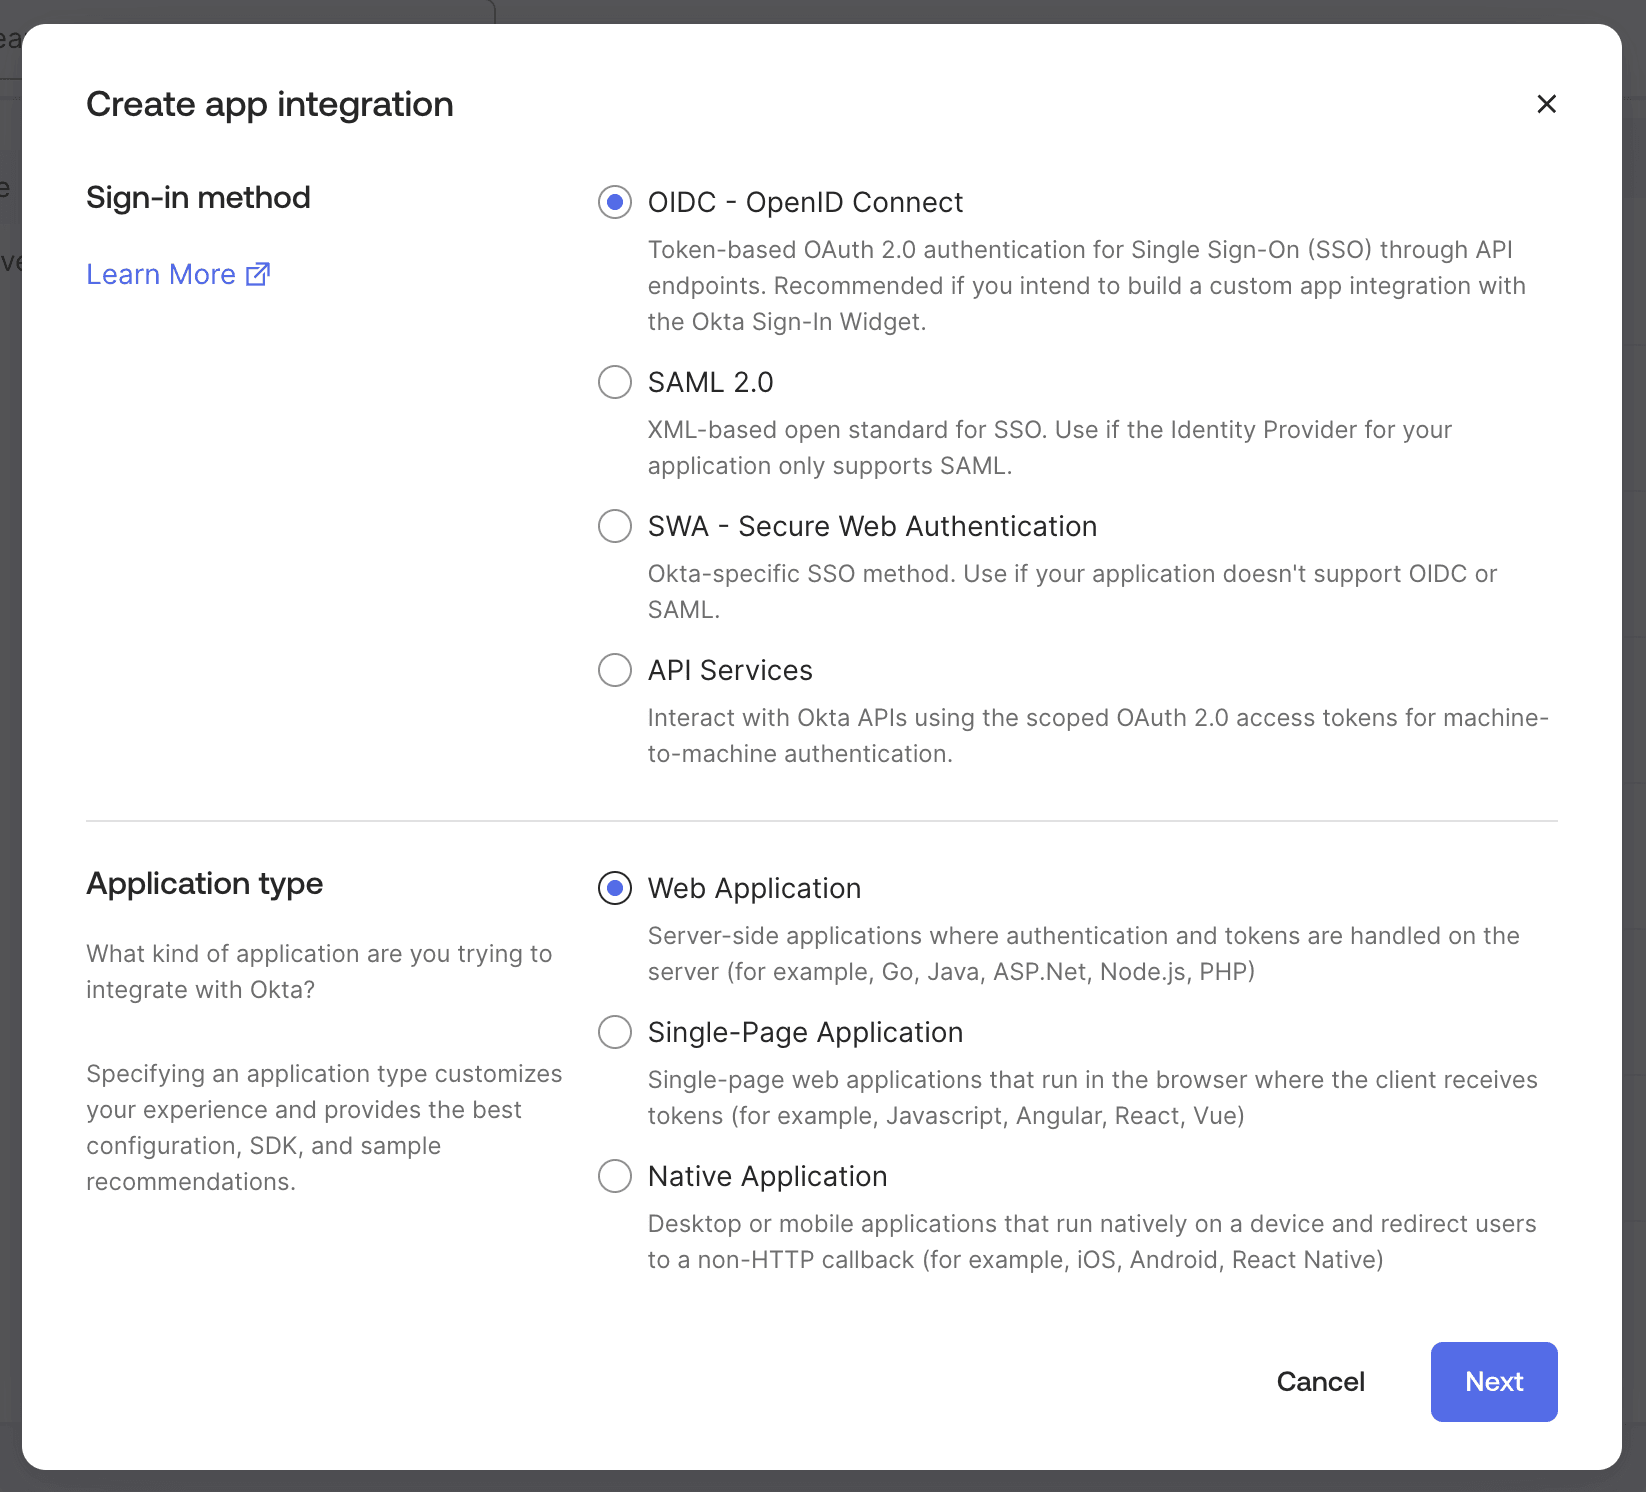
Select Next and name the configuration PostHog.

Navigate to your PostHog organization's authentication settings, scroll down to OIDC, then select Configure.


Copy the Redirect URL from PostHog into the Okta app's Sign-in redirect URIs field.

In Okta, choose which users to assign to the application, then select Save.

Copy the Client ID and Client Secret from Okta into the configuration fields in PostHog.

Enter your Okta instance's domain as the Issuer URL in PostHog.


Select Save configuration in PostHog.
The next time you enter your email address during login, you will see an option to login using OIDC.
Example: OneLogin
In OneLogin admin, go to Applications and select Add App.

Search for "OpenId Connect (OIDC)". Select the option that appears with that exact name, and which shows "OneLogin, Inc." as the author.

Name the configuration "PostHog ODIC", then select Save.

Navigate to your PostHog organization's authentication settings, scroll down to OIDC, then select Configure.
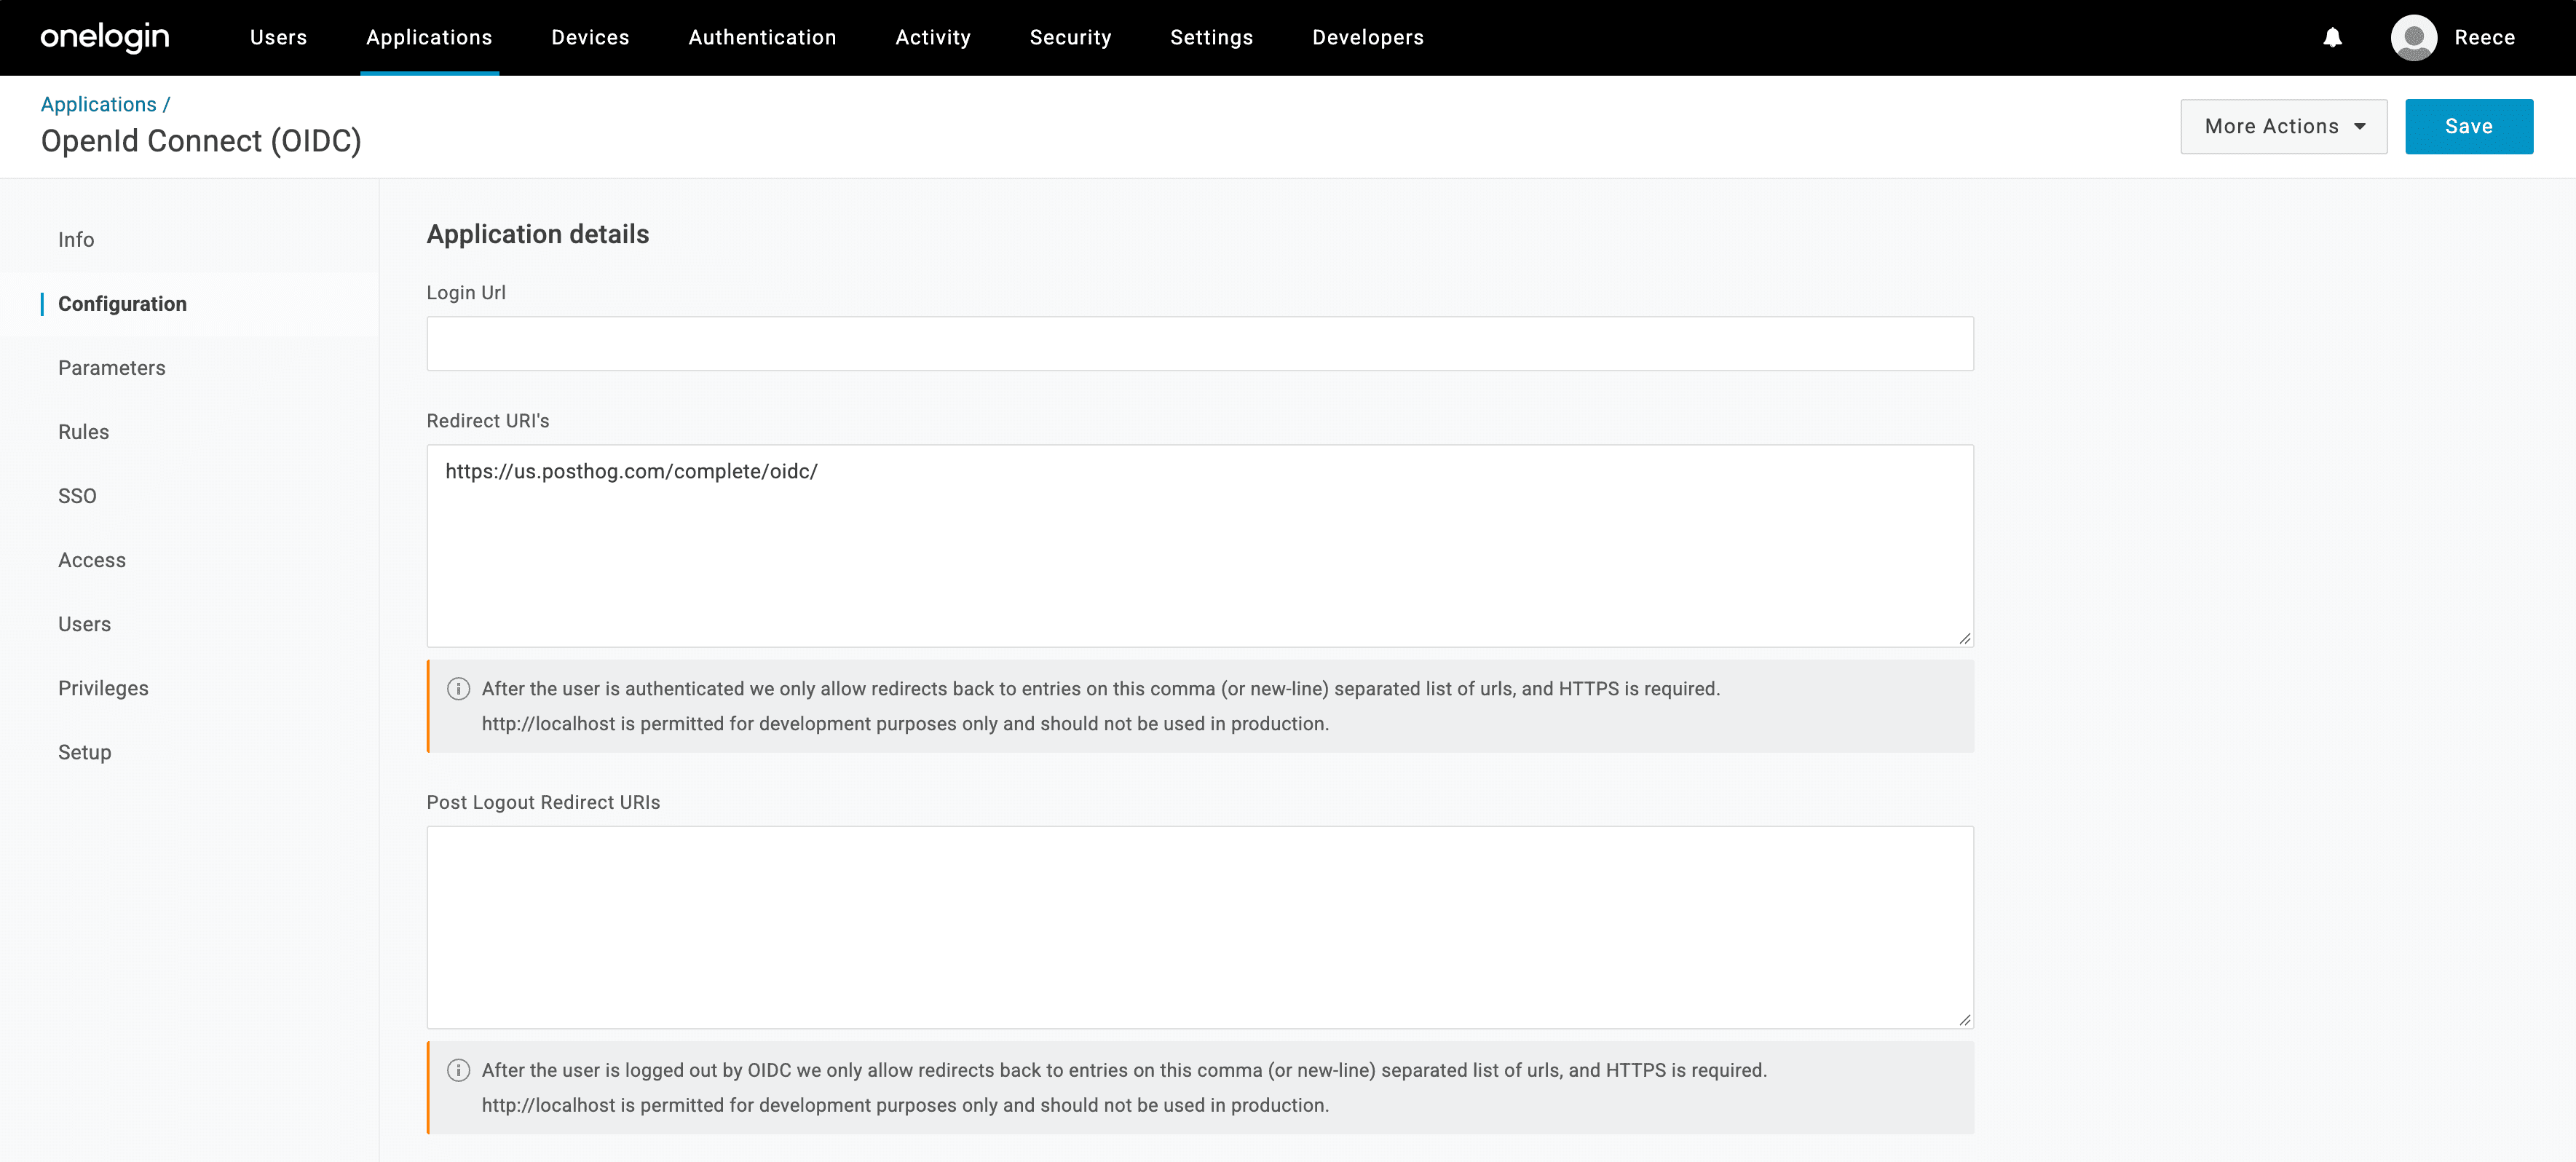
In OneLogin navigate to the Configuration tab. Copy the "Redirect URL" from PostHog into the "Redirect URI's" field in OneLogin.
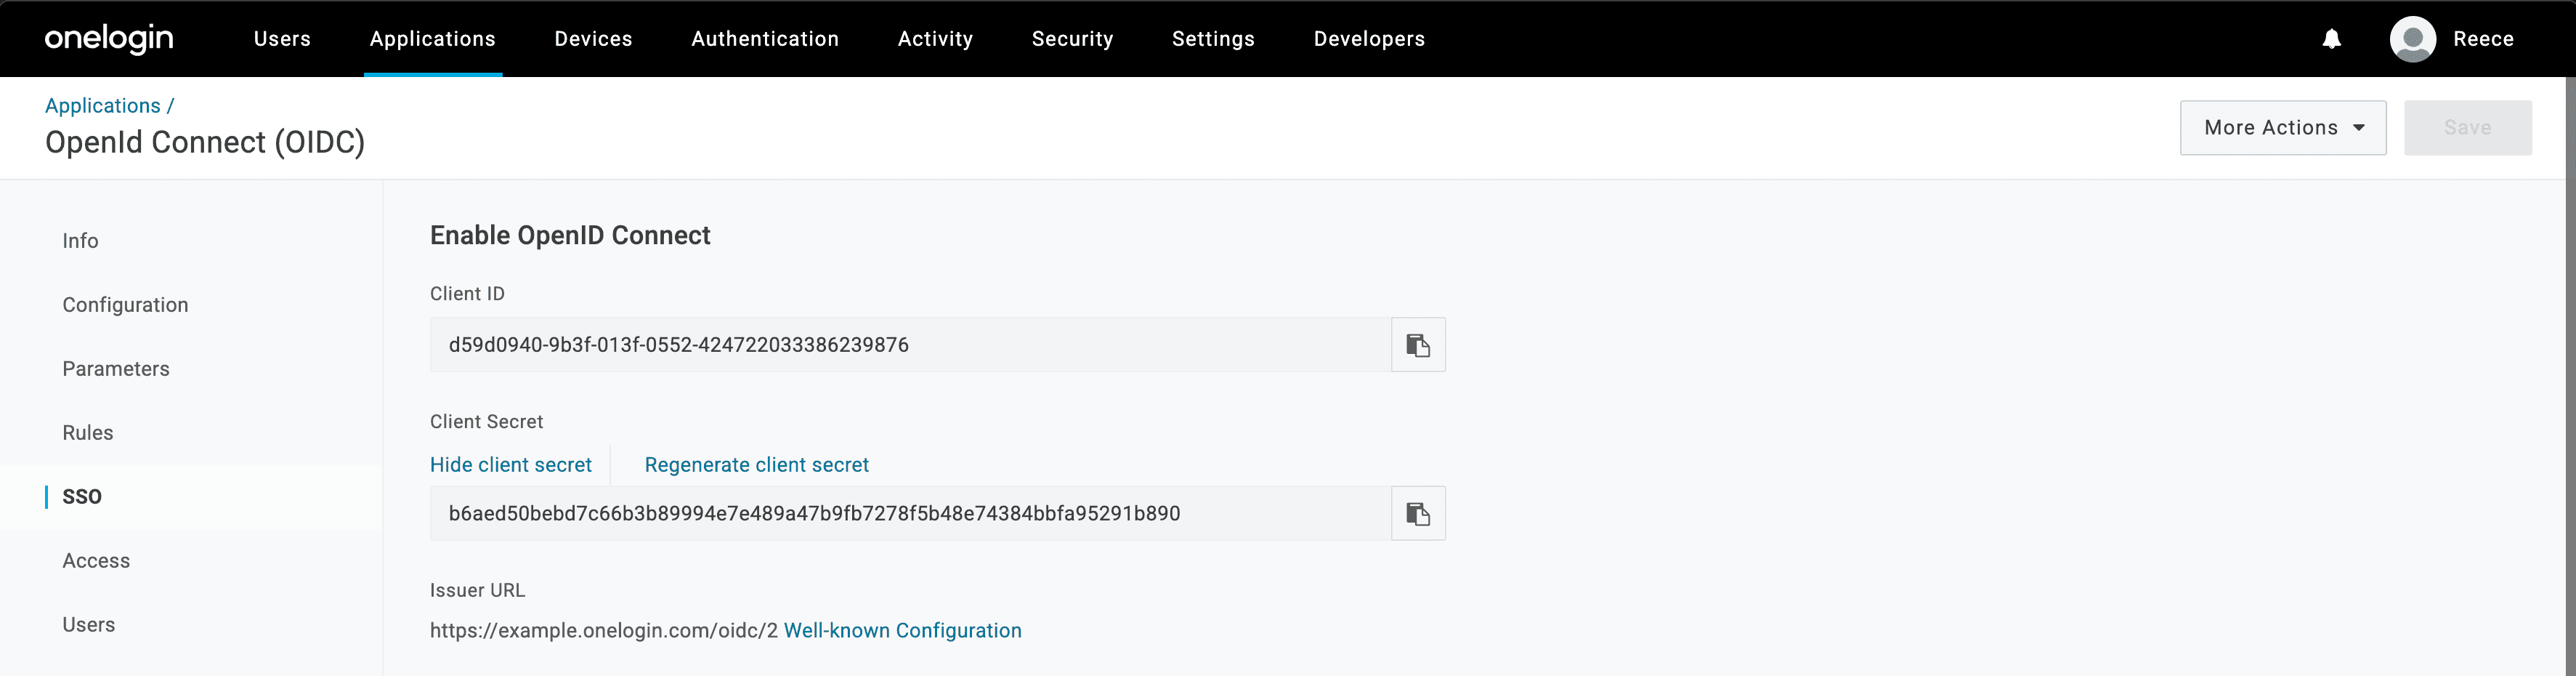
In your OneLogin OIDC app, go to the SSO tab. Copy the Client ID, Client Secret, and Issuer URL from OneLogin into the configuration fields in PostHog.
Select Save configuration in Posthog.

In OneLogin, choose which users to assign to the application.
OneLogin does not send the
email_verifiedclaim during the OIDC handshake. Because PostHog requires this claim, we must configure the OneLogin app to send it.a. In OneLogin go to Users → Custom User Fields. Select New User Field.

b. For the name enter "Email verified". For the short name enter "email_verified". Select Save.

c. Go to Users → Mappings. Select New Mapping.
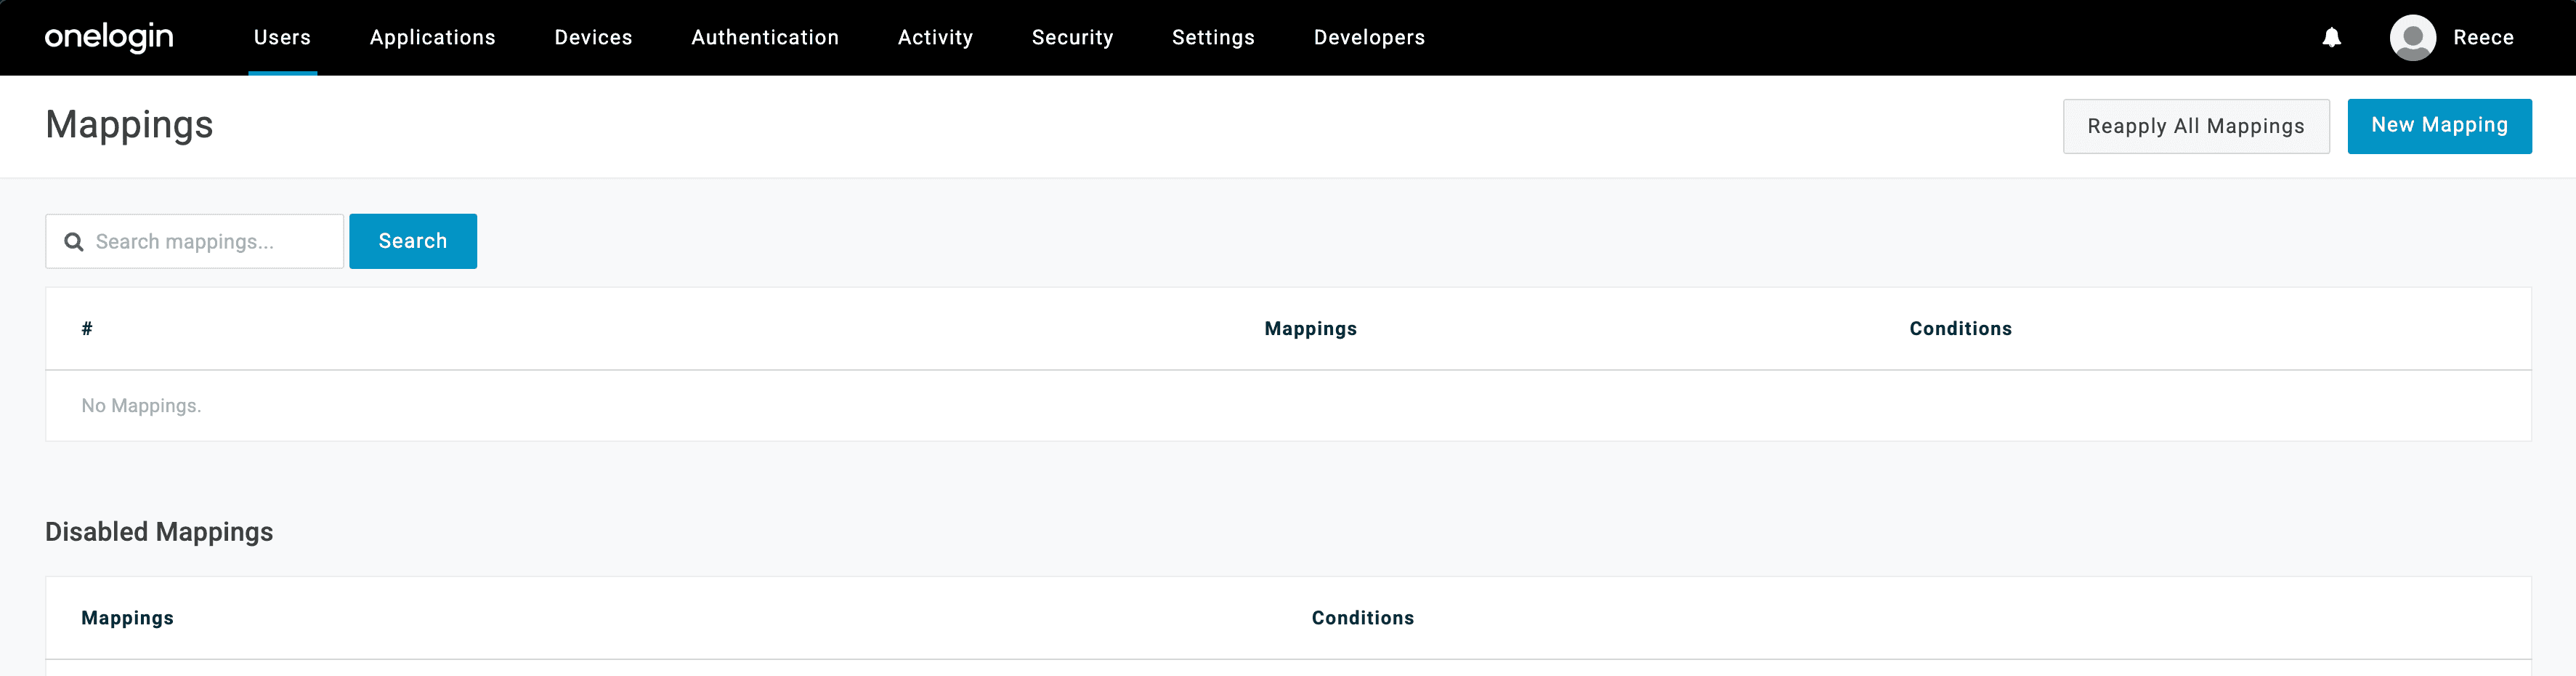
d. Name it "Email verified". Select whatever condition you would like, for example
Status = Active. For the action, select "Set Email verified" and set the value to "true". Select Save.
e. Select Reapply All Mappings. If you see a confirmation dialog, select Continue.
f. Go to Applications. Select your OIDC application, then navigate to the Parameters tab. Click the + icon on the top right of the table.
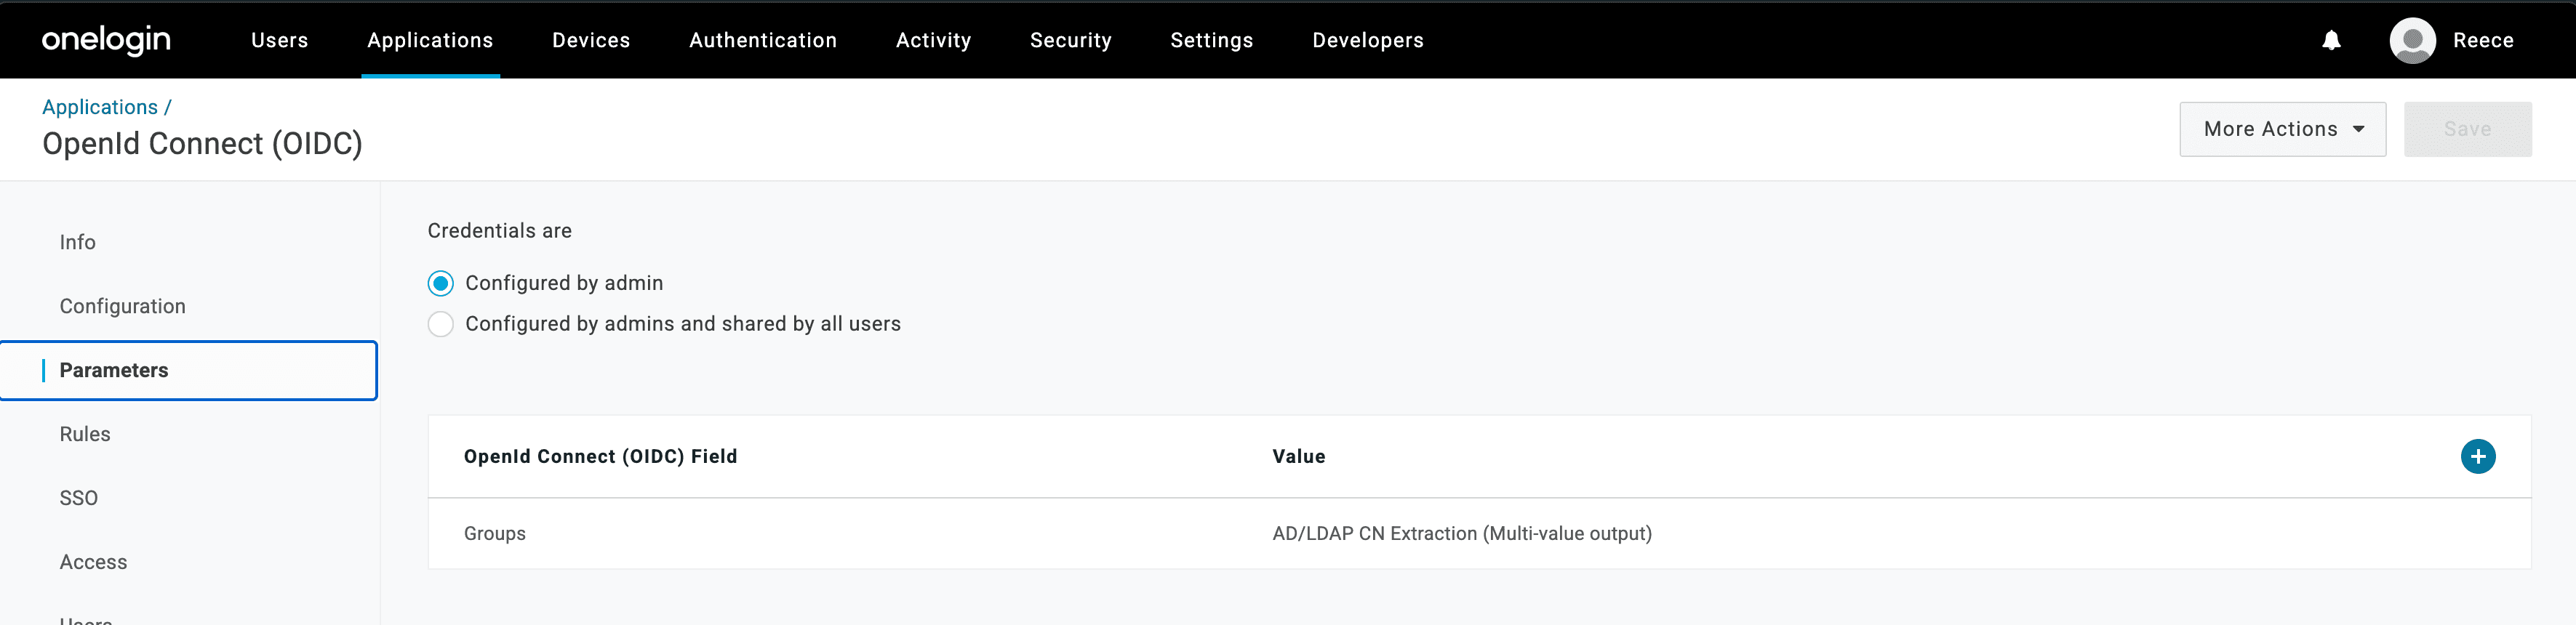
g. Name the field "email_verified". Select Save.

h. For the value search for and select "Email verified (Custom)". Select Save.

The next time you enter your email address during login, you will see an option to login using OIDC.
Warnings
When using OIDC to authenticate users in PostHog, there are a few considerations to keep in mind:
Only use OIDC with identity providers you trust and that verify the user's email address. During login we use the email address provided by the identity provider. An untrusted identity provider could spoof a user's email address to impersonate your users.
Enabling or enforcing OIDC will not disable Personal API Key usage. Users can authenticate with the PostHog API using their API keys without first authenticating via OIDC. You can use ID-JAG (XAA) to programmatically restrict API access using policies defined in your identity provider.
Our OIDC integration only handles authentication and user provisioning. It does not handle user removal. You can use SCIM to automatically deprovision users.
When you enable or enforce OIDC, any existing user passwords are saved. If you disable OIDC SSO in the future, your users will be able to login using their pre-existing password credentials.